|
Adjusting the Ball Trough on WOZ
Get perfect launches into the shooter lane [almost] every time!
Posted by Daniel Tonks on August 7, 2013 at 1:28 AM
Tags: Jersey Jack Pinball, The Wizard of Oz, Troubleshooting,
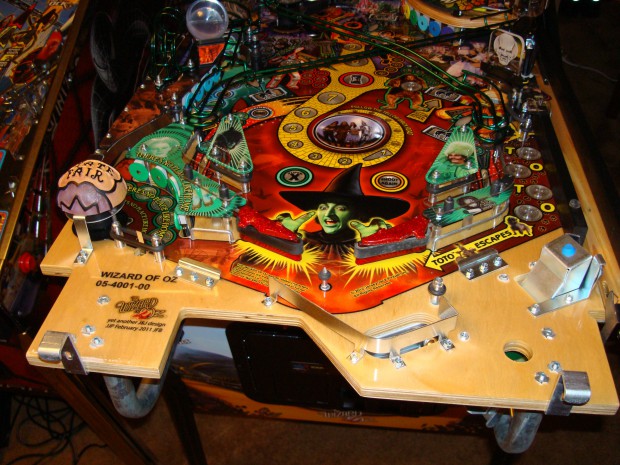
Comments (2) | Permalink | RSS Feed After you’ve unboxed and are enjoying your brand new Wizard of Oz pinball, you may come across a situation where the game randomly has trouble loading balls into the shooter lane – they seem to pop up, hit something in the exit, and then fall back down... where the cycle repeats. Sometimes this happens half a dozen times (or more) in a row. Increasing or decreasing the ball trough VUK coil strength might seem like an easy solution, but in my case this reduced the frequency of occurrences, but didn’t solve them completely.
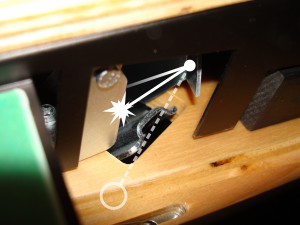
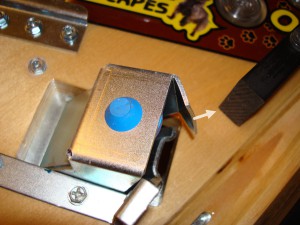
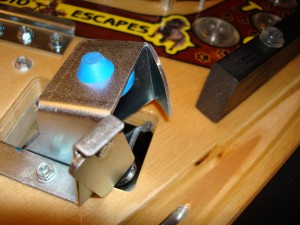
At first, the culprit would seem to be the little free-moving metal flap that swings closed over the trough exit to prevent balls from falling out and damaging your playfield when it’s lifted into the vertical position – but this is not actually the case. The most likely cause is the thick piece of metal on the other side, the one that deflects the balls on their way up. It’s supposed to direct them safely into the shooter lane, but in certain instances balls rebound at too sharp an angle, whacking hard into the opposite side and falling back down. Now, this particular piece of metal has been adjusted at the factory to operate correctly, but since the factory doesn’t test games at the normal incline of 6.0 or 6.5 degrees that you probably have in your home, it’s possible that further tweaking is needed. After one game where I watched my Toto ball save timer run out before a ball was even successfully served, I contacted JJP tech support and the ever-helpful Lloyd provided the following instructions (slightly edited here):
After making this simple adjustment, failed serves are now an extremely rare occurrence, and always corrected on the second attempt. This is as good as or better than my other pinballs. Recent Related Blog Posts
|
Tag Central
|
Pinplay Pinball Blog
» Add a comment!
2 reader comments
My WOZ machine had that random issue of failing to load a ball when I needed to. I dreaded and dreaded because I couldn't find anyone in Kelowna to fix it. I did so much research t- that's how I know it's a common problem, and finally I found an appliance company of all things, <a href="https://www.kelownaappliancerepair.com/">Speedy Appliance Repair Ltd Kamloops BC</a>, to take a look and they did because my wife knows the manager. I could have saved the headache if only I had read this article 3 years ago! Thanks so much for the tips nonetheless, gonna print this page off just in case.
Dan,
Thanks for the clear writing and helpful pictures, you are doing a great job documenting a new owner's finds and fixes. Kudos!
Thanks for the clear writing and helpful pictures, you are doing a great job documenting a new owner's finds and fixes. Kudos!


