|
Tuesday August 13, 2013
Adjusting the drop-down feet for optimal Witch squishage.
This past weekend I had the glass off my Wizard of Oz pinball to make an adjustment (if your Haunted Forest ever looks like a tornado went through and leaned a tree, let me know if you need any help) and, after doing that, I took the opportunity to conduct a few camera tests. However, instead of shooting random footage with no purpose, I ended up with something that might be mildly useful to new owners.
On my game, after each software update the default settings for Dorothy’s spinning house results in the Wicked Witch of the East’s trapped legs looking like they’re sticking out of the gutters, instead of being solidly squished under the floorboards. I’ve seen a few comments from new owners and location players about suspiciously malfunctioning feet, which is almost certainly nothing more than a need for calibration. To help make the process as straightforward as possible, I’ve created a quick video tutorial on how to adjust the spinning house and drop-down wall for optimal presentation of those gaudy striped socks and hotly contested ruby red slippers. Check it out below, and let me know what you think! Be sure to select 720p or 1080p for the best quality.
Posted by Daniel Tonks on 8/13 at 7:31 AM
Saturday August 10, 2013
New software promises brighter general illumination.
On Friday, Jersey Jack Pinball released a new software update for The Wizard of Oz – which replaced another update from only the day before. Among the just-released version 1.18’s extensive list of new features, bug fixes and other improvements since prior major version 1.14, it also includes a note for “GI lamp brightness corrected”. As discussed in my post earlier this week on how to improve the GI lamp assembly’s alignment on your WOZ, the overall brightness of the game’s general illumination has been the subject of some controversy – so just how much does this software actually change things?
To help answer that question, I’ve taken video of WOZ running both software v1.14 and v1.18. To ensure a completely fair comparison, the game was filmed in a dark room where the only source of illumination was the game itself, the video camera was mounted on a tripod, and I used identical manual exposure values for both versions. I’ve prepared the resulting footage in a handy comparison video that you’ll find below.
Posted by Daniel Tonks on 8/10 at 6:45 AM
Wednesday August 7, 2013
Get perfect launches into the shooter lane [almost] every time!
After you’ve unboxed and are enjoying your brand new Wizard of Oz pinball, you may come across a situation where the game randomly has trouble loading balls into the shooter lane – they seem to pop up, hit something in the exit, and then fall back down... where the cycle repeats. Sometimes this happens half a dozen times (or more) in a row. Increasing or decreasing the ball trough VUK coil strength might seem like an easy solution, but in my case this reduced the frequency of occurrences, but didn’t solve them completely.
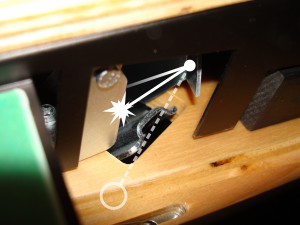
At first, the culprit would seem to be the little free-moving metal flap that swings closed over the trough exit to prevent balls from falling out and damaging your playfield when it’s lifted into the vertical position – but this is not actually the case. The most likely cause is the thick piece of metal on the other side, the one that deflects the balls on their way up. It’s supposed to direct them safely into the shooter lane, but in certain instances balls rebound at too sharp an angle, whacking hard into the opposite side and falling back down. Now, this particular piece of metal has been adjusted at the factory to operate correctly, but since the factory doesn’t test games at the normal incline of 6.0 or 6.5 degrees that you probably have in your home, it’s possible that further tweaking is needed. After one game where I watched my Toto ball save timer run out before a ball was even successfully served, I contacted JJP tech support and the ever-helpful Lloyd provided the following instructions (slightly edited here): Posted by Daniel Tonks on 8/07 at 1:28 AM
Sunday August 4, 2013
Proper alignment equals optimal illumination.
JJP’s The Wizard of Oz pinball uses an entirely new type of general illumination (GI) system. Specifically, there are 23 surface-mount LEDs positioned below the playfield, each installed on a small circuit board attached to a metal mounting bracket. Since LEDs are normally highly directional (think laser beams), JJP has come up with a system where the LEDs shine through the playfield via clear plastic tubes with a frosted exterior, which are intended to carry the light up to the playfield surface for dispersion in method more similar to traditional non-directional incandescent bulbs.
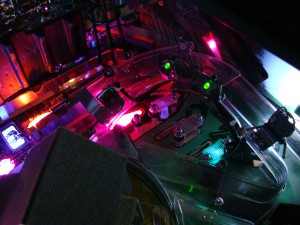
At least, that’s the theory. One of the current discussion points for WOZ is that the general illumination is a little on the dim side – at least for those who like to play in a darkened room (like yours truly). This is enough of an issue that some WOZ owners are already showing off their newly modded games with added spotlights. Still, it’s been explained by Jersey Jack personnel that the game’s GI is currently running at only 36.5% power, meaning there’s a lot of brightness yet to be had, and an eagerly awaited software release is supposed to unlock some of this potential brightness. However, if you’re a WOZ owner looking forward to a brighter GI, then before this new software comes out you might want to first check something on your machine – because there could be a very good reason why your GI is not quite up to snuff, and it’s not something that a software upgrade will fix. The other day I was looking at the GI elements on my game, and I noticed that one obvious one was not showing any light – just the faintest of glows, as you can see in the first photo (it’s the one directly to the left of the “O” lane in “OZ”). Apparently, the most likely cause of this is that the LED circuit board has become “rotated” (since there’s only one mounting screw for each), resulting in the LED no longer shining directly through the plastic tube like it should. A simple loosening of the screw and correction of its position should fix the issue. Tonight, I lifted my playfield to make this adjustment... and was not prepared for what I found. Posted by Daniel Tonks on 8/04 at 7:38 AM
Wednesday July 24, 2013
The components that make Jersey Jack Pinball’s The Wizard of Oz a game designed like no other!
If you’ve been even casually following the development of JJP’s The Wizard of Oz pinball machine over the past two-and-a-half years (and by finding this blog, chances are high that you have been!), then it’s also quite likely that you’ve had the opportunity to see numerous photographs of the playfield and cabinet exterior. Ho hum, right?
Now don’t get me wrong – sure, I’m going to have plenty of high-resolution playfield photographs right here on Pinplay, but just not yet. For today, I thought it’d be more interesting to offer everyone a view of the game that’s a little less common: specifically, everything hidden inside that gorgeous clearcoated cabinet! True, there have been interior photographs taken of WOZ before, but most have been of prototype machines with non-final hardware, and quite a few changes have happened since those early days. So, let’s get started, and remember that you can click on each photo to blow it up – and then once again for extra-high-resolution!
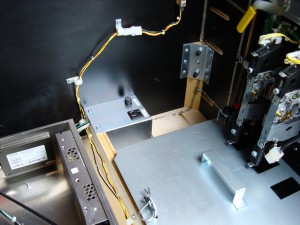
Cabinet FrontJumping right in (as it were), in this first photograph we’re looking inside the front-right corner of the cabinet. The first thing techies will probably spot is the open electronics cage in the bottom left of the photograph, but kindly divert your eyes because we’ll be getting to that soon enough. Instead, why not behold the glory of the service outlet! Okay, well... there’s always the good ol’ coin box below two stock 25-cent mechanisms (incidentally, although quarters are appropriate for US machines, for operators here in Canada these should’ve been loonie and toonie mechanisms).If those items haven’t got the blood pumping yet, then for something that truly epitomizes the general build quality and sturdiness of JJP’s first pinball, take a look at those beefy metal corner brackets that the leg bolts attach to – an excellent idea considering that WOZ weighs north of 300 pounds! Also, note how the bottom of the cabinet is made from plywood instead of MDF, how the joints are constructed using pocket screws, and how the black paint is even down to the bottom of the panel without overspray. This is one good-looking and well-built game!
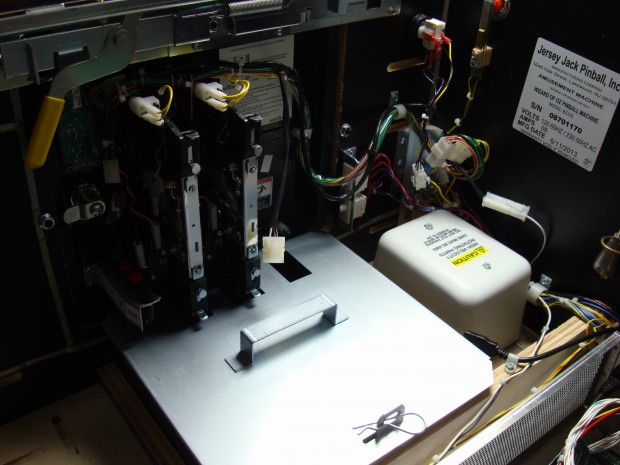
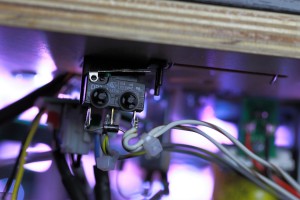
We’re now looking at the inside left side of the cabinet. In the top left corner of this photo is the yellow lockdown bar release handle, which unlatches two metal catches on the actual bar. Just to the right of the coin mechs, hidden inside that little plastic box plastered in warning notices, is the shaker motor. Above the shaker are the high voltage cut-off switches, along with various cables for the coin door electronics. You’ll note a second serial number sticker here on the inside of the cabinet, which duplicates the one on the back. Posted by Daniel Tonks on 7/24 at 8:14 AM
|
Tag Central
Archive
Random Photo
|
Pinplay’s Postings Tagged as "The Wizard of Oz"

Thanks for the inspiration,
[Link: timothyrjeveland.com]